Antelope Canyon Photography Guide
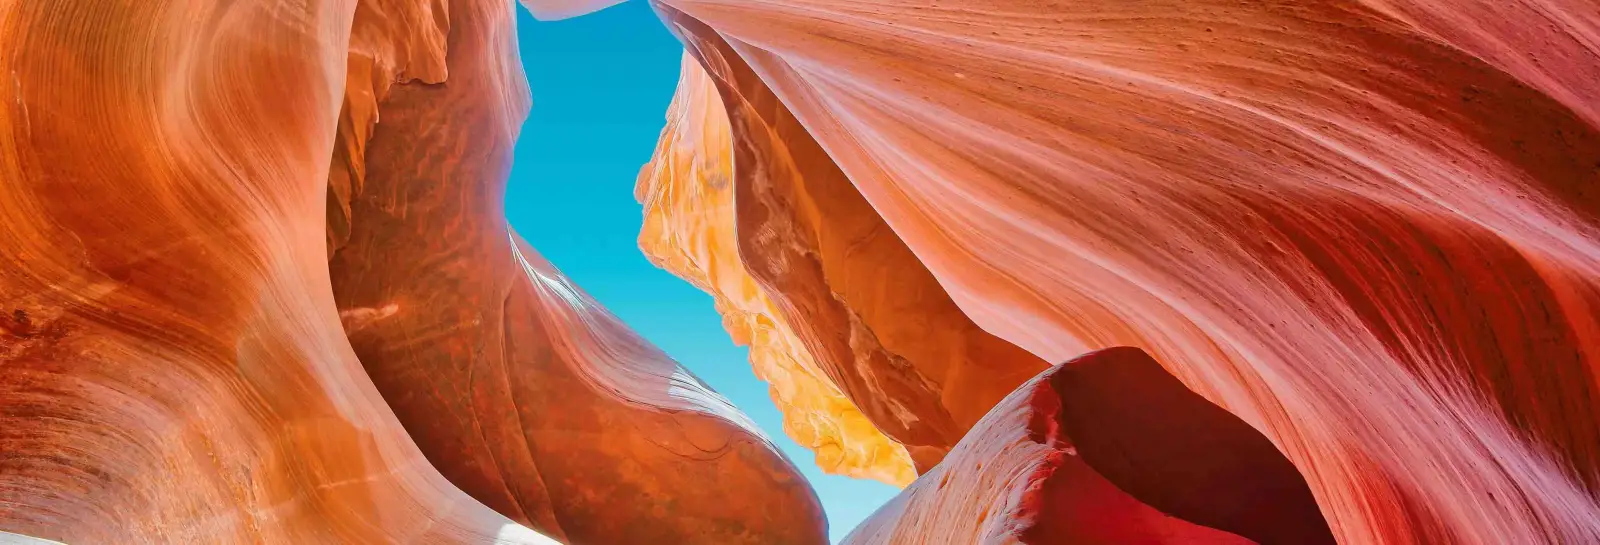
Antelope Canyon is one of the most photogenic slot canyons in the world, but it’s also a fast-moving guided experience in narrow corridors. This guide covers realistic camera and phone techniques, recommended settings, and how to work with reflected light and contrast—so you can capture strong images while keeping pace with your group.
What Makes Antelope Canyon Hard to Photograph
Antelope Canyon looks effortless in photos, but real shooting conditions are challenging: extreme contrast, low light, tight spaces, and a moving guided pace.
Extreme Contrast
Bright openings and deep shadowed corridors create high dynamic range. If you expose for highlights, shadows can go dark; if you lift shadows too far, you’ll introduce noise and muddy color.
Tight Space + Movement
You’re shooting in narrow corridors with people behind you. Stop points are brief, and switching lenses or changing settings slowly can cost shots. Fast, repeatable settings matter more than perfection.
Low Light, Sand & Dust
Light levels can drop quickly deeper inside the canyon. To keep shutter speed usable, you may need higher ISO. Fine sand can also get onto lenses—keep changes minimal and wipe gear carefully.
Camera Settings That Actually Work (Quick Starting Points)
These are practical starting points for most visitors shooting handheld on guided tours. Adjust as needed based on light and movement.
-
Handheld General Setup
ISO 400–800 · f/8–f/11 · 1/60–1/125 sec · Shoot RAW · Auto WB -
Deeper / Lower-Light Sections
ISO 800–1600 · f/8 · 1/60 sec minimum · Use image stabilization if available -
Light Beams or Bright Openings
ISO 100–400 · f/8–f/11 · Slightly underexpose (−0.3 to −1 EV) to protect highlights
Why These Settings Work
Apertures around f/8–f/11 keep textures sharp across curved walls. Moderate ISO balances noise control with usable shutter speeds. Slight underexposure preserves highlight detail near canyon openings, which you can lift later in post-processing if shooting RAW.
Avoid constantly changing settings. Pick a stable base configuration and make small adjustments when light conditions noticeably shift.
Phone Photography Tips (iPhone & Android)
Modern phones can capture strong images inside Antelope Canyon—if you manage exposure and contrast carefully.
Lock Exposure Before You Shoot
Tap the brightest area you want to preserve (usually near the canyon opening), then use exposure compensation to slightly darken the image. This prevents blown highlights and keeps color in bright sections.
Use HDR Carefully
HDR can help balance shadows and highlights, but in high-contrast canyon scenes it may flatten depth or over-brighten shadows. If your phone allows manual HDR control, test both on and off to see which retains more natural contrast.
Be Careful with Night Mode
Night mode may slow the shutter dramatically. If people are moving or you’re not fully stable, images can blur. In narrow corridors, sometimes a slightly darker but sharper image looks better than a bright, soft one.
Keep It Steady
Brace your elbows against your body or gently against a wall (without leaning hard on sandstone). Stability improves detail and reduces motion blur, especially in deeper sections of the canyon.
Composition Cheats: 3 Shots You Should Always Get
If time is limited on a guided tour, focus on these three reliable compositions.
Curves & Leading Lines
Look for sweeping S-curves along the canyon walls. Use a wide-angle perspective and frame so lines guide the eye upward or deeper into the corridor. Keep the frame clean—avoid including other visitors when possible.
Abstract Textures
Zoom in on layered sandstone patterns and cross-bedding lines. These abstract details work well when contrast and color gradients are strong. Slight underexposure preserves texture depth.
Silhouettes & Reflected Light
Position a subject near a bright opening and expose for the highlights. The resulting silhouette emphasizes scale while reflected light creates warm tones along the walls.
Light Beams: When They Happen & How to Shoot Them
Light beams are one of the most photographed features of Antelope Canyon—but they are not guaranteed. They depend on season, time of day, and dust in the air.
When Light Beams Are Most Likely
- Stronger in late spring and summer months.
- Most visible when the sun is higher in the sky.
- More common in sections with narrow overhead openings.
- Not guaranteed on cloudy days or low-angle winter light.
For seasonal timing details, see Best Time to Visit.
How to Capture Light Beams
- Expose for highlights to avoid blown-out beams.
- Slightly underexpose (−0.3 to −1 EV) if shooting digital.
- Use a moderate aperture (f/8–f/11) for texture clarity.
- Increase shutter speed slightly to prevent motion blur.
- Avoid over-editing saturation—beam contrast is naturally strong.
What You Can Bring (and What Usually Isn’t Allowed)
Rules may vary by operator and canyon section. Always confirm with your tour provider before arrival.
Typically Allowed
- Camera body with attached lens
- Smartphone
- Small handheld accessories
- Extra battery stored in pocket
- Lens cloth for dust
Often Restricted or Not Recommended
- Tripods or monopods (commonly restricted)
- Large camera bags or backpacks
- Frequent lens changes in narrow sections
- Loose items that slow group movement
- Selfie sticks or extended mounts
Tour Pace & Photo Etiquette (Don’t Slow the Group)
Antelope Canyon is experienced on a guided tour. Being prepared and efficient helps everyone enjoy the visit.
Set Your Camera Before Entering
Choose a stable base setting before the tour begins. Constantly adjusting ISO, changing lenses, or reviewing every shot slows you down and can block narrow passages.
Shoot Quickly at Stop Points
Guides often pause briefly at visually strong sections. Frame your shot, capture a few variations, and move on. Lingering too long disrupts the flow of the group.
Be Aware of Space
Corridors are narrow. Step aside after shooting and avoid backing into others. Keep gear compact and close to your body to prevent accidental contact with walls or visitors.
Respect Guide Instructions
Guides know the canyon’s safest and most photogenic areas. Following their directions ensures both safety and better photo opportunities.